For those of you, who like me, don't appreciate the default focussing screen that comes with the CFV back, there is an easy alternative. This is what I did:
I discovered some old transparent inkjet film that I'd experimented with sometime ago (hopeless images).
With this is mind, in Photoshop I drew a 58mm square on a white background and within that, centered, a 36.7mm square. Between the two squares I added a mid-dark grey, then printed out the image onto the film, the grey came out semi opaque.With a scalpel I cut the square out of the sheet and also the clear centre out, leaving me with a grey mask. I then
snipped the corners off by about 2mm and cut four notches out of the outer sides of the mask.
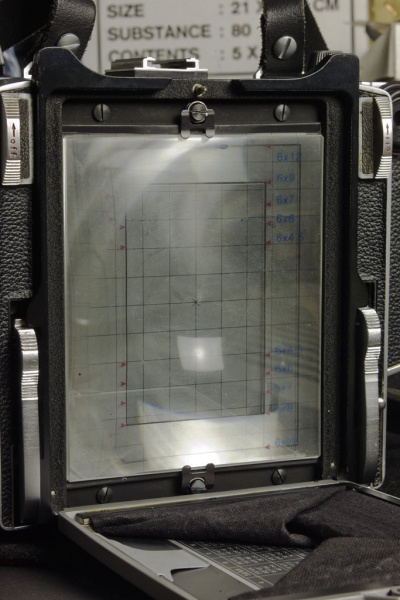
I removed the ground glass and dropped the acetate mask into the camera and then placed my favourite Accumatte clear screen above it. As most of you must know, the focussing screen sits proud of the camera aperture, held by four adjustable pins, this allows space for the acetate mask, the notches in the mask allow it to fit around the pins.
Now, when I look through the WLF I get a clear square in the centre, the grey mask allows me to view action outside of the CFV frame, and the focussing is much easier.
I discovered some old transparent inkjet film that I'd experimented with sometime ago (hopeless images).
With this is mind, in Photoshop I drew a 58mm square on a white background and within that, centered, a 36.7mm square. Between the two squares I added a mid-dark grey, then printed out the image onto the film, the grey came out semi opaque.With a scalpel I cut the square out of the sheet and also the clear centre out, leaving me with a grey mask. I then
snipped the corners off by about 2mm and cut four notches out of the outer sides of the mask.
I removed the ground glass and dropped the acetate mask into the camera and then placed my favourite Accumatte clear screen above it. As most of you must know, the focussing screen sits proud of the camera aperture, held by four adjustable pins, this allows space for the acetate mask, the notches in the mask allow it to fit around the pins.
Now, when I look through the WLF I get a clear square in the centre, the grey mask allows me to view action outside of the CFV frame, and the focussing is much easier.